


Make it! An all ages craft tutorial for a clay trinket dish
- Charlotte

- Aug 10, 2020
- 3 min read
Hello there, I’m Charlotte, 1/3 of the Make it Mindful team, and owner over @handmadeandcreativemarket
With all of us spending so much time at home this Summer, today in our craft tutorial we’re going to be bringing the outdoors inside. In our first ever MiM Make It tutorial we will be making a trinket dish from air dry clay and one of the wonderful Summer leaves. You can paint it in keeping with the season, go neon and eye catching like I have or even break out your favourite glitter.
This craft project is suitable for all ages but be sure to supervise the little ones - clay in the carpet is never a good thing! You can also use pastry cutters or go abstract and create your own shapes.
This is also the perfect opportunity to build in some outdoor learning if you are home schooling. Take some time to identify the trees you are gathering leaves from or you could even do a bug hunt.
Download a tree ID guide from the RSPB here
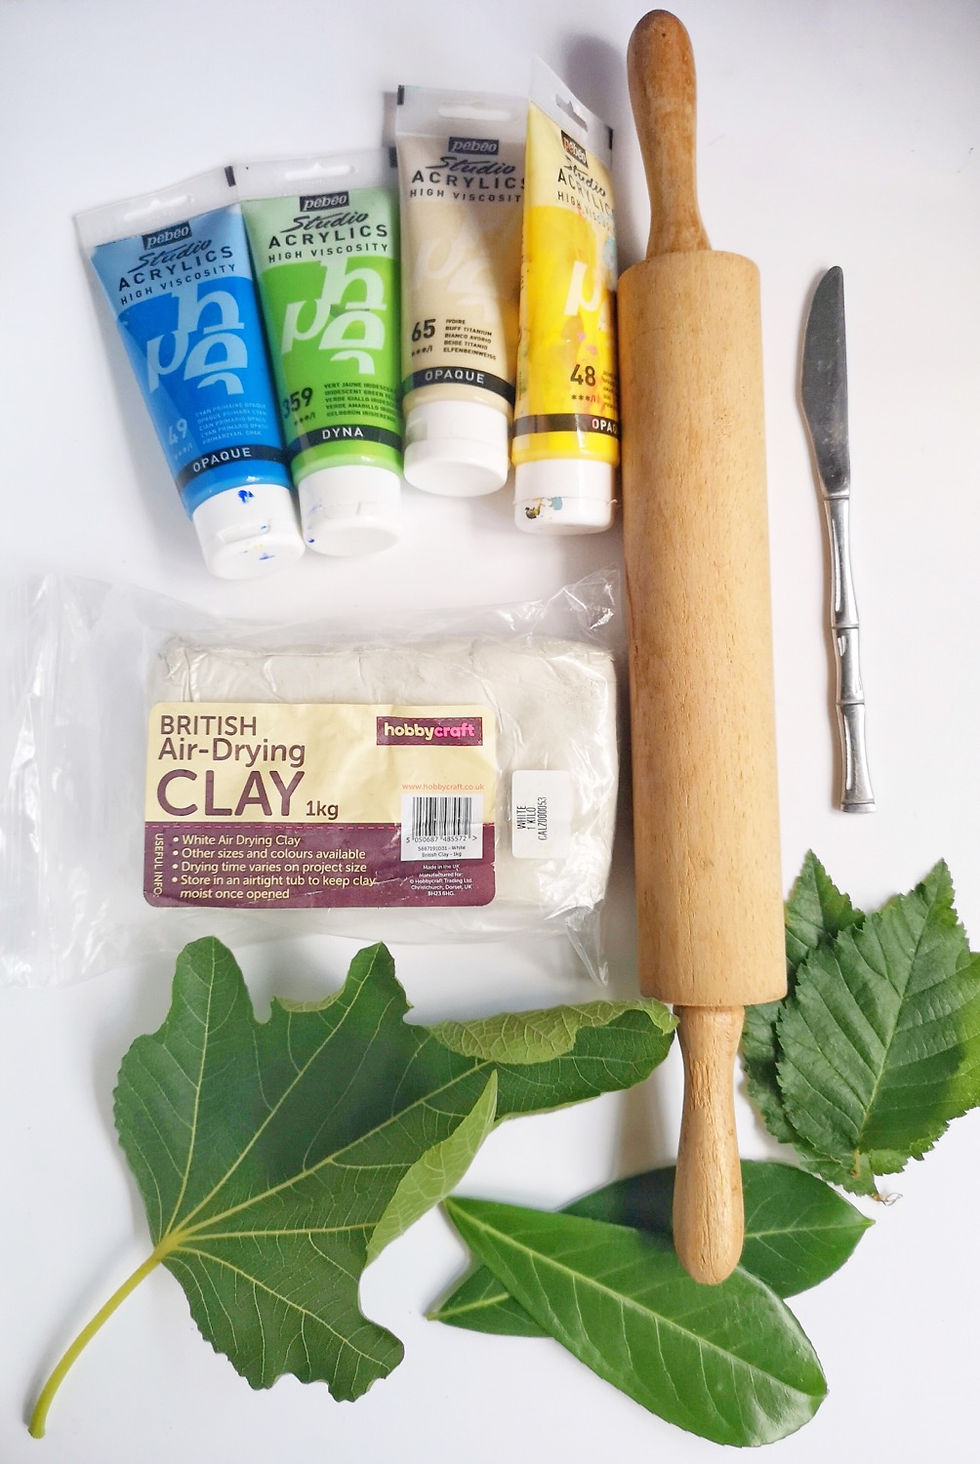
Essential equipment:
Air dry clay
Rolling pin
Leaves
Paint or nail polish
Paint brush
An old kitchen knife
Optional equipment:
A bowl or teacup to shape your dish
Cling film to prevent sticking
A silicone mat or cornflour to prevent sticking
Glitter
A water based sealant such as mod podge
Air dry clay can be purchased for around £4 for a 1kg block from a variety of retailers such as Hobbycraft and The Range. You can make a lot of leaves with this amount so store it in an air dry container for our upcoming Christmas crafting project. I love Pebeo Studio Acrylics but they are a bit more costly at £4 a tube. You can’t beat the vibrant Dyna metallic paint they do however standard craft acrylic or even old nail polish will be great for this project - just make sure you’re in a well ventilated room if using nail polish. I want to be able to use my trinket dish on a daily basis so I’ve chosen to seal it with a water based sealant too.
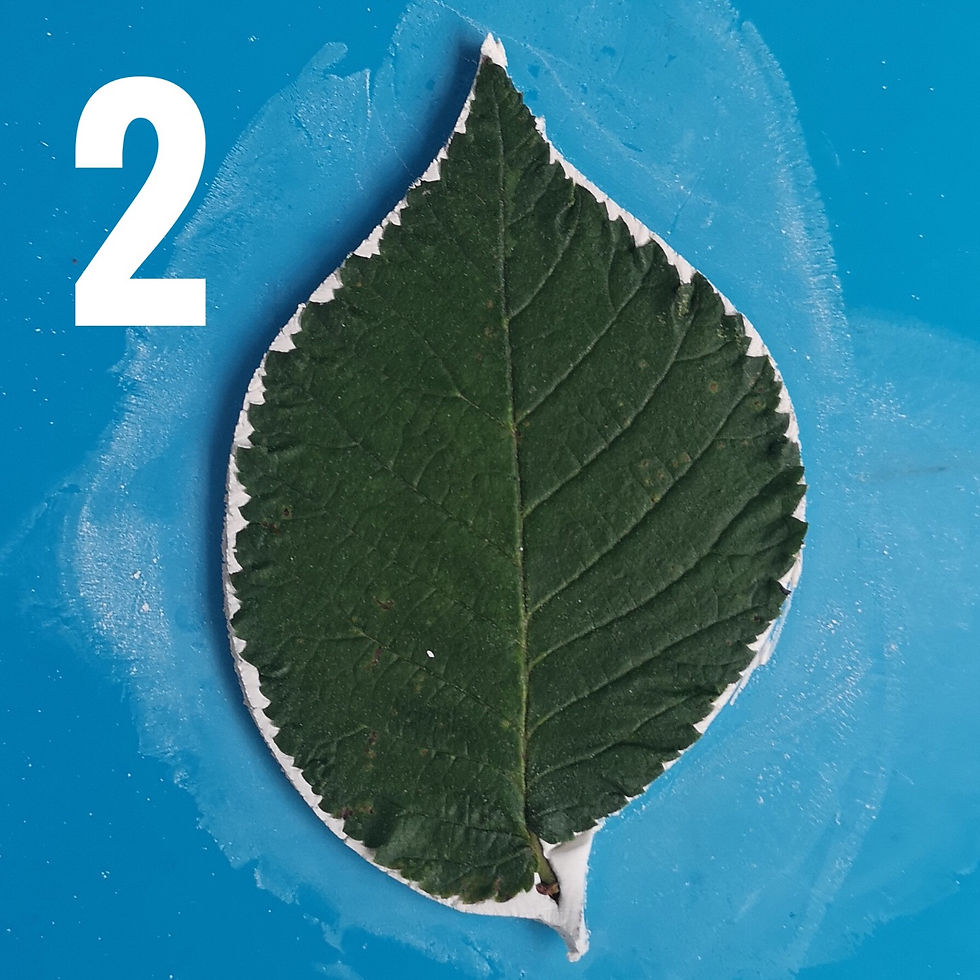
Step 1: Soften a piece of clay by squashing it in your hands then roll it out to around 5mm thick with your chosen leaf on the surface. Thicker leaves with pronounced veins work best. I have used a silicone mat for rolling but you can just lift with a flat knife.

Step 2: Trim off any excess clay from the edges of your leaf.
Step 3: Peel the leaf from the surface of your clay. If you have rough edges simply dip your finger in a little water and smooth out the edges.

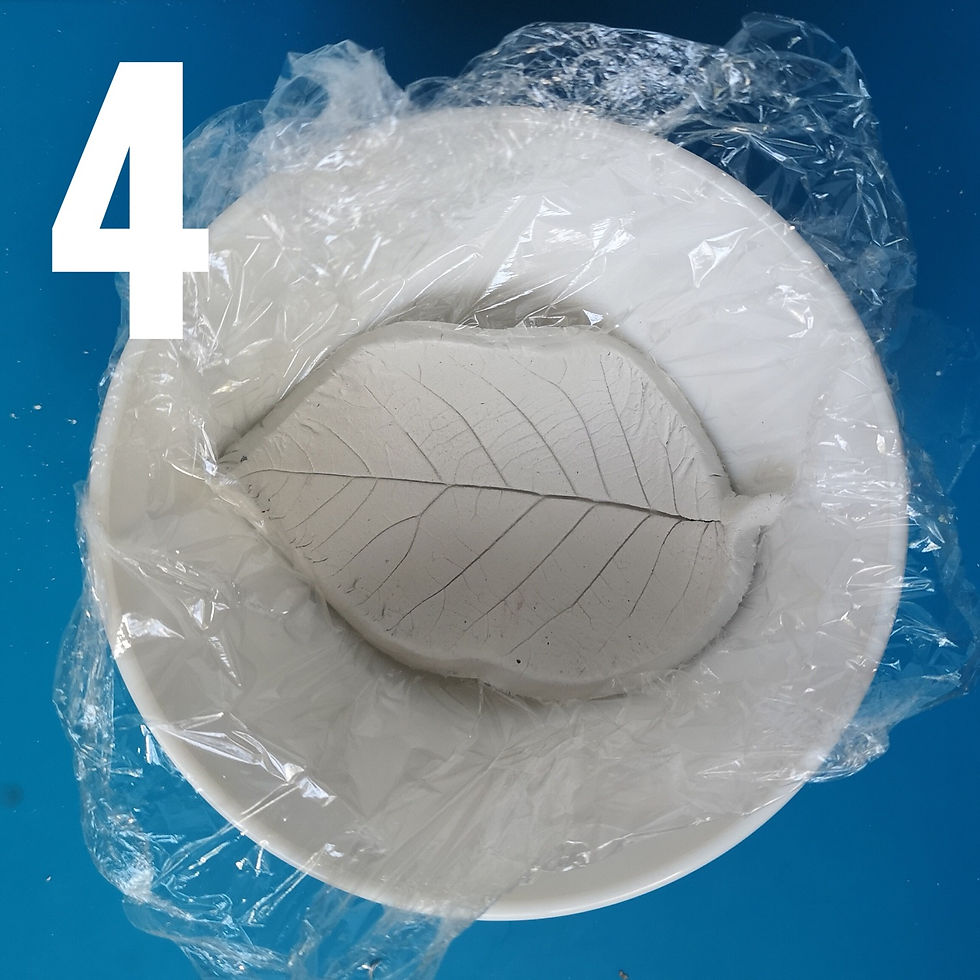
Step 4: Gently shape your leaf with your fingers. Lying it in a bowl or teacup with a curved base will help it keep its shape as it dries. I would advise lining the bowl with cling film to ensure it doesn’t stick.
Step 5: Leave your leaf to dry. It will be a uniform, off white colour all over. This takes 24 hours for most brands of clay but thicker pieces will take longer. Once dry, decorate your piece as you choose.

For my final piece I went for a lime green metallic paint. As you have so much clay left over feel free to experiment. I made this shaped tea light decoration for fun and still have loads left for our upcoming Christmas craft project. We’d love to see your creations here at MiM so please tag us on social media @makeifmindful.norfolk or #MiMMakeIt

As I am a passionate small business supporter, you can get the little bee brooch and a range of other fabulous things from Jazzy Menagerie at https://www.etsy.com/shop/jazzymenagerie/
Tutorial text and images copyright MiM Norfolk and Handmade and Creative Market 2020.
Comments